



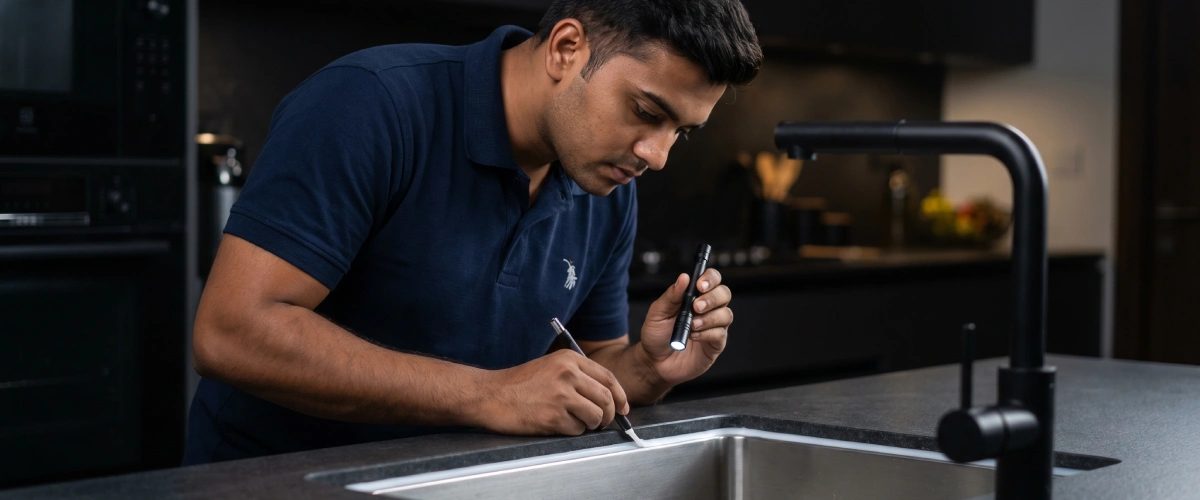

I actually tackled that kitchen sink sealing job myself last month. Looks pretty professional, right?

Our expert walked over. To the untrained eye, the bright white bead looked neat enough. But to someone who seals joints for a living, the red flags were glaring.

DIY home improvement can be incredibly rewarding, but when it comes to waterproofing the busiest workstation in your home, what you can't see will hurt your wallet.
WHAT IS SILICONE CURE TIME?
Silicone cure time is the amount of time required for silicone sealant or rubber to fully harden and develop its intended strength and performance after application.
It was a typical Tuesday morning when one of our lead technicians at Silicone Crew arrived at a client’s apartment in South Delhi.
The scheduled job was straightforward: a master bathroom sealant refresh.
But as our tech was packing up his gear, the homeowner leaned proudly against her kitchen island, pointed at the basin, and said, “I actually tackled that kitchen sink sealing job myself last month. Looks pretty professional, right?”
Our expert walked over.
To the untrained eye, the bright white bead looked neat enough.
But to someone who seals joints for a living, the red flags were glaring. It took him exactly 30 seconds to spot five critical mistakes that were already setting the stage for unseen water damage and future mold growth beneath the granite.
DIY home improvement can be incredibly rewarding, but when it comes to waterproofing the busiest workstation in your home, what you can’t see will hurt your wallet.
Inside a Professional Kitchen Sink Inspection
This story plays out in kitchens across the country. A tube of sealant costs ₹80 at the hardware store.
The repair it was supposed to prevent costs anywhere from ₹6,000 to ₹40,000 — once you account for swollen cabinetry, mould remediation, and countertop re-fitting. The gap between those two numbers is almost always explained by five specific mistakes that professionals see on nearly every DIY kitchen sink sealing job.
We asked one of our senior technicians — who has handled sealing work across hotels, hospitals, commercial kitchens, and hundreds of residential properties — to walk us through what he looks for the moment he walks into a kitchen.
What follows is a direct, researched account of every error he catches, why each one matters, and what correct kitchen caulking for sink joints actually involves.
₹6K–40K
typical repair bill when a failed sink seal reaches the cabinet substrate
72 hrs
full cure time required before a sealed kitchen sink should be used
5–7 yrs
lifespan of a correctly applied sanitary-grade silicone seal
6 wks
how fast mould colonises a wrong-product seal in humid Indian conditions
Quick Summary: The 6 Mistakes
Here is exactly what our expert saw, why it matters, and how you can avoid making the same costly errors.
Mistake 1 — using the wrong product entirely
The hardware store aisle has dozens of sealant tubes, and most of them look identical to someone who doesn’t work with them professionally.
White, grey, clear — labels that say “waterproof,” “flexible,” “kitchen and bath.” The problem is that the right product for kitchen sink sealing is a very specific thing, and most of what’s sold in general hardware stores is not it.
The joint between a kitchen sink and its countertop is what’s technically called a “permanently wet zone.”
It doesn’t just get splashed occasionally — it cycles through standing water, cooking oils, cleaning chemicals, temperature swings from hot tap water to cold, and in Indian kitchens, the added load of high ambient humidity for months at a time.
A general-purpose acrylic sealant, or even a low-grade silicone hybrid, is simply not formulated to survive this environment.
WHY IT FAILS SO QUICKLY
Acrylic sealants air-dry rather than moisture-cure. They lack the molecular flexibility to handle joint movement and are highly porous once dry — making them ideal breeding grounds for mould. In independent tests, acrylic sealants around kitchen sinks fail visibly within 3–6 months.
The correct specification for any kitchen sink water seal is 100% silicone — not a “siliconised acrylic,” not an acrylic hybrid that “contains silicone.”
Specifically, you need a sanitary-grade neutral-cure or acetoxy-cure silicone with built-in antifungal agents, certified food-safe for use in food-adjacent wet zones.
Sanitary grade silicone is a formulated silicone sealant specifically designed for wet, humid environments where hygiene is critical — primarily bathrooms, kitchen sink sealing and other wet areas.
Sanitary grade contains built-in fungicide and biocide additives that are compounded into the sealant itself.
This inhibits the growth of mould, mildew, and bacteria within and on the surface of the cured sealant.
Products at this specification are used in restaurant fit-outs, hospital kitchens, and pharmaceutical facilities — because they are tested to resist exactly the conditions your kitchen sink deals with every day.
| Product Type | Mould Resistance | Flexibility | Suitable for sink? | Typical lifespan |
| General-purpose acrylic | None | Rigid | No | 3–6 months |
| Siliconised acrylic hybrid | Low | Moderate | Marginal | 6–12 months |
| Basic hardware-store silicone | Low | Good | Sometimes | 1–2 years |
| Sanitary-grade silicone (pro) | High | Excellent | Yes | 5–7 years |
| Neutral-cure structural silicone | High | Excellent | Yes | 7–10 years |
Neutral Cure vs Acetoxy Cure
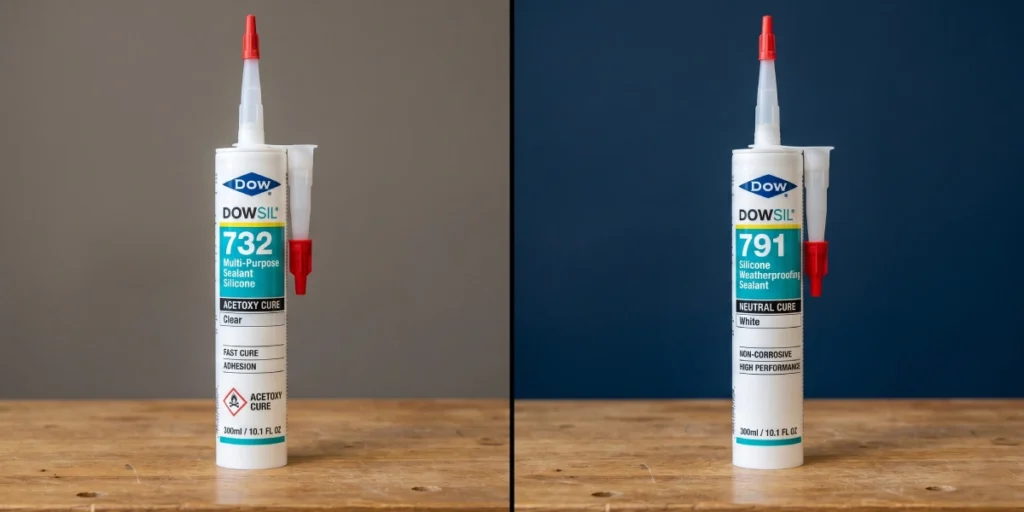
Sanitary grade or any silicone sealant on the market falls into one of these two categories.
These are the two only curing chemistry types in silicone sealants, and choosing the wrong one can cause serious problems on a job site.
Acetoxy Cure
Acetoxy cure silicone sealant releases acetic acid as it cures — that’s the strong vinegar smell. The moisture in the air reacts with the sealant and drives off the acid as a byproduct — which are largely harmful to surrounding material such as metals and stones.
vs
Neutral Cure
Neutral cure releases non-acidic byproducts — typically oxime, alkoxy, or amine compounds — which are largely harmless to surrounding materials such as metals, glass and stones etc.
| Property | Acetoxy Cure | Neutral Cure |
|---|---|---|
| Smell during cure | Strong vinegar odor | Mild or odorless |
| Cure byproduct | Acetic acid (corrosive) | Oxime / Alkoxy (non-corrosive) |
| Cost | Lower | Higher |
| Bond to glass | Excellent | Good-Excellent |
| Safe on metals | ❌ Corrodes copper, brass, zinc, lead | ✅ Safe on all metals |
| Safe on natural stone | ❌ Stains marble, limestone, granite | ✅ Safe on all stone |
| Safe on concrete/masonry | ❌ Can cause efflorescence | ✅ Compatible |
| Safe on mirrors | ❌ Attacks silver backing | ✅ Safe |
| Electronics/electrical | ❌ Corrosive to contacts | ✅ Used in electrical applications |
| Cure speed | Faster | Slightly slower |
| UV/weathering resistance | Good | Excellent (typically) |
Indian homes frequently feature Kota stone, black granite, Shahabad, or marble countertops — all of which are porous and slightly acidic. For these surfaces, neutral-cure silicone is mandatory. Acetoxy-cure silicones release acetic acid during curing, which can stain or etch natural stone permanently. This is a distinction most DIY applicators never know to make.
Mistake 2 — applying new sealant over old, failed material
This is the single most common kitchen sink sealant repair mistake — and in a way, it’s understandable.
The old bead looks cracked or discoloured, so you squeeze fresh sealant over the top, smooth it down, and the joint looks clean again. Job done.
Except it isn’t. Cured silicone is chemically inert. It will not bond to itself or to any other cured silicone — not even from the same product range.
What you’ve actually done is create a cosmetic top layer with no structural adhesion to the substrate underneath. Within two to four weeks, as the joint flexes under the normal movement of the sink, the new layer peels away from the old one, opening micro-gaps that are invisible to the eye but channel water directly below the countertop surface.
WHAT HAPPENS BELOW THE SURFACE
Water that enters through micro-gaps in a failed seal kitchen sink countertop joint doesn’t announce itself. It travels horizontally along the underside of the stone or laminate and drips into the cabinet below. By the time you notice a dark stain or smell, the particleboard cabinet interior has typically been wet for weeks.
Complete removal of the old sealant is non-negotiable.
This means mechanical removal using a proper silicone scraper or remover tool — not a screwdriver, which scratches the sink rim — followed by a solvent wipe with isopropyl alcohol to remove the microscopic residue that remains even after scraping. Any old material left on the substrate acts as a release agent against the new sealant.
The correct removal sequence
Mistake 3 — sealing on a surface that isn’t truly clean or dry
Even when someone removes the old sealant properly, this third mistake quietly undoes the work.
The kitchen sink environment is one of the most contaminated surfaces in any home. Cooking oil aerosolises from the hob and settles on every nearby surface. Soap and cleaning products leave a film that’s invisible once dry.
Hard water deposits form a thin mineral crust on stone or ceramic. And in India’s climate — regardless of whether you’re in the dry heat of Rajasthan or the year-round humidity of coastal cities — atmospheric moisture is always a variable.
Silicone forms its adhesive bond through direct contact with the substrate at a molecular level.
Any contamination — oil, soap film, dust, or moisture — creates a barrier between the silicone and the surface.
The sealant cures fine, but it’s bonded to the contamination layer, not the substrate. When that layer breaks down, the seal comes with it.
THE MOISTURE PROBLEM IS MORE SPECIFIC THAN IT SOUNDS
A surface can look and feel dry but still carry enough moisture to compromise adhesion — particularly Indian stone countertops, which are porous and absorb ambient humidity. Professional technicians use a pin-type moisture meter before application; we will not proceed if substrate readings exceed 12% relative moisture content.
Mistake 4 — cutting the nozzle incorrectly
Of all the things that happen before the first drop of silicone reaches the joint, this is the one that determines the entire character of the bead.
And yet most people treat it as an afterthought — a quick snip with a pair of scissors, wherever seems about right.
Our technician can tell from across the room whether a nozzle was cut correctly. The bead tells him immediately.
The nozzle of a silicone cartridge is a precision instrument in the sense that how you cut it controls three things simultaneously: the width of the bead, the flow rate of the material, and the angle at which the sealant contacts the joint. Get any of these wrong and the bead is compromised before the gun trigger is even pulled.
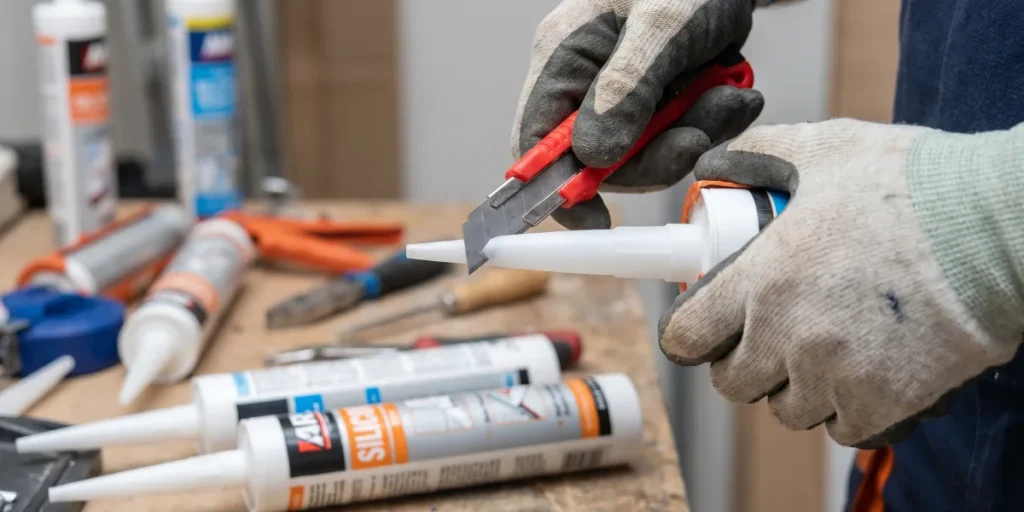
The most common nozzle mistake
Cutting the nozzle straight across — at 90 degrees — instead of at 45 degrees. A straight-cut nozzle pushes sealant forward and upward rather than pressing it into the joint, resulting in a bead that sits on the surface rather than penetrating the joint walls. This bead has adhesion on its underside only — not on both joint faces — and fails rapidly under movement.
What angle and opening size actually mean
The 45-degree cut is not arbitrary.
When the gun is held at the correct working angle — typically 45 degrees to the joint surface — a 45-degree nozzle cut results in the opening being presented parallel to the joint.
This allows the sealant to be pushed or pulled into the joint walls on both sides simultaneously, ensuring two-surface contact which is the fundamental requirement of any joint seal.
A straight cut at the same working angle presents the opening at 90 degrees to the joint, which means the silicone is deposited on top of the surface rather than pressed into it.
The opening size is equally critical. Kitchen sink sealing joints in Indian homes typically run between 5mm and 10mm wide. The nozzle opening should be cut to roughly half the joint width — so a 6mm joint needs a 3mm opening, not a 6mm one.
Cutting the opening too wide — which is what happens when someone slices too far down the nozzle — releases more material than the joint can accept cleanly, creating a bead that overflows the joint edges and sags under its own weight before it can be tooled.
Mistake 5 — applying the bead incorrectly
This is where the visible craft of sealing sits, and it’s where the gap between a professional result and an amateur one becomes obvious.
Proper kitchen caulking for sink joints requires specific knowledge of bead geometry, application speed, and tooling technique — none of which comes from watching a two-minute YouTube video.
he most common bead mistakes our technician spots: a bead that is far too thick (more material doesn’t mean better sealing — it means the sealant sags, traps air, and takes much longer to cure); a bead applied in multiple stops and starts (every stopping point creates a weak joint); and a bead that was never properly tooled after application.
Professional guidance specifies a joint width of 6–10mm for kitchen sink applications, with depth at roughly half the width.
A 10mm wide joint should be 5mm deep — not filled to the brim.
Overfilling a joint wastes material, creates stress concentrations, and causes the bead to skin slowly on the outside while remaining uncured underneath — a condition called “surface cure before through-cure” that leads to internal void formation.
Three-point adhesion failure — a specific and serious risk
An excessively deep bead in a narrow joint sticks to the back wall of the joint as well as both sides. This is called three-point adhesion and it is a well-documented cause of cohesive failure. Silicone needs to flex — when it is bonded on three faces instead of two, movement in the joint stresses it simultaneously from multiple directions. It relieves that stress by splitting down the centre. Backer rod foam inserts exist specifically to prevent this in deep joints; for most kitchen sink applications, simply not overfilling the joint achieves the same result.
How bead application errors reduce effective seal lifespan
Estimated lifespan (months) by application quality — sanitary-grade product assumed in all cases
WHY TOOLING MATTERS
Tooling — drawing a wetted finger or professional tool along the bead immediately after application — does three things simultaneously: it presses the silicone firmly into both sides of the joint ensuring full contact with the substrate, it creates a slightly concave profile that sheds water rather than holding it, and it eliminates surface voids. The window for tooling is typically 5–10 minutes after application, after which the surface begins to skin and cannot be worked without tearing.
Mistake 6 — Rushing the Cure Time
This final mistake is the one that quietly invalidates all the good work done in steps one through four. Silicone curing is a chemical process — Room Temperature Vulcanising (RTV) — that requires atmospheric moisture to progress.
It is not simply “drying.” A silicone bead that looks set after a few hours may have formed a skin on the surface while remaining uncured beneath it, and that interior is still chemically active and adhesively incomplete.
Water contact on an uncured or partially cured silicone bead doesn’t just slow the curing — it actively dilutes the sealant at the bond interface, prevents full adhesion to the substrate, and leaves the cured bead with a cloudy, wrinkled, or permanently tacky texture. The result is a seal that looks like it failed within weeks but was actually compromised before it was ever used.
THE CURING SCIENCE
Standard acetoxy-cure silicones form a tack-free skin in 30–60 minutes at 23°C and 50% relative humidity. Full through-cure for a standard kitchen sink bead takes 24–72 hours depending on bead thickness. Research shows that humidity significantly affects cure rate — below 30% RH (common in air-conditioned rooms in Indian summers), cure times extend substantially. Neutral-cure silicones typically cure more slowly than acetoxy types.
What happens when all six mistakes combine
These five mistakes rarely occur in isolation.
A typical DIY kitchen sink sealing job involves all of them at once — wrong product, over old sealant, on a surface cleaned only with tap water and wiped with a kitchen cloth, with a lumpy untooled bead that the kitchen was using again by evening.
The result is a seal that fails within months and, far more seriously, a failure that is invisible until serious structural damage has already occurred.
Substrate saturation
Water enters through micro-gaps and travels laterally inside the countertop substrate before dripping into the cabinet
Structural wood damage
Particleboard and plywood cabinet interiors absorb water rapidly — once saturated, they cannot be dried back to structural integrity
Mould colonisation
Dark, enclosed, constantly damp cabinet interiors are ideal mould environments. Black mould (Stachybotrys) can establish within 24–48 hours of sustained moisture
Air quality impact
- Mould spores from under the sink circulate through kitchen air. Particularly problematic in enclosed flat kitchens with limited ventilation
Quick audit: how does your kitchen sink seal score right now?
Use this checklist to assess your current kitchen sink water seal situation. Each item you can’t tick is a risk factor.
Quick audit: how does your kitchen sink seal score right now?
Use this checklist to assess your current kitchen sink water seal situation. Each item you can’t tick is a risk factor.
What professional kitchen sink sealing actually looks like
When a Silicone Crew technician carries out a seal kitchen sink countertop job — in a standalone kitchen, a commercial fit-out, or a residential renovation — the process is structured around removing all five risk factors above. Surface preparation takes longer than application.
Material selection is made based on the countertop substrate, not just the joint type. Cure conditions are communicated to the client before they leave the room.
Ready to get it done right the first time?
Silicone Crew operates across Delhi, Gurugram, Noida, Mumbai, Bengaluru, Hyderabad, Faridabad, and Ahmedabad. Residential and commercial projects.
Free Quote Our Services